Search another article?
Launch NVS Scans from SGBox and execute them using Qualys probe
In this article are described the steps to run vulnerability scan using Qualys probe.
Qualys is Cloud platform, but allows you to download a probe in order to scan also your local IP.
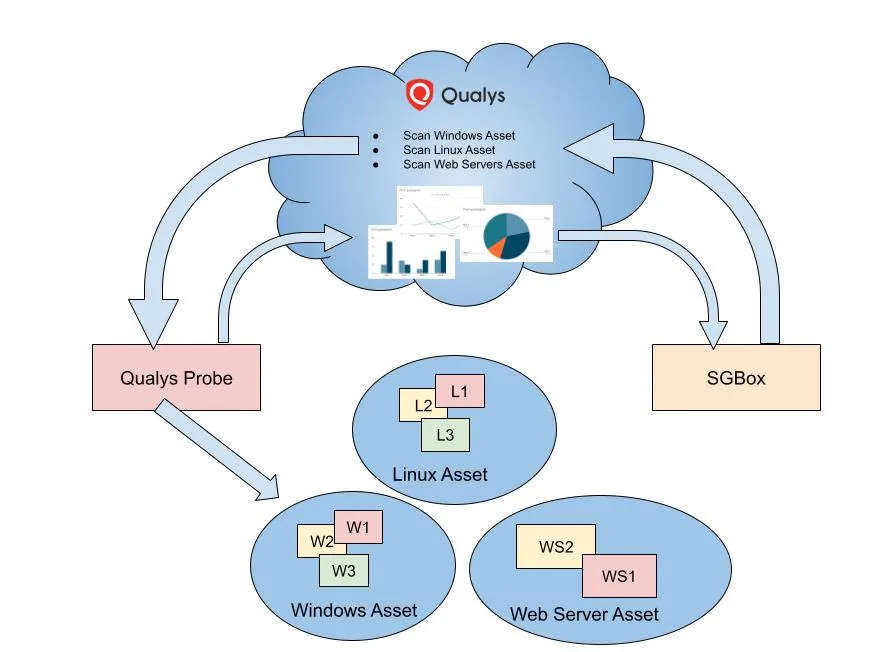
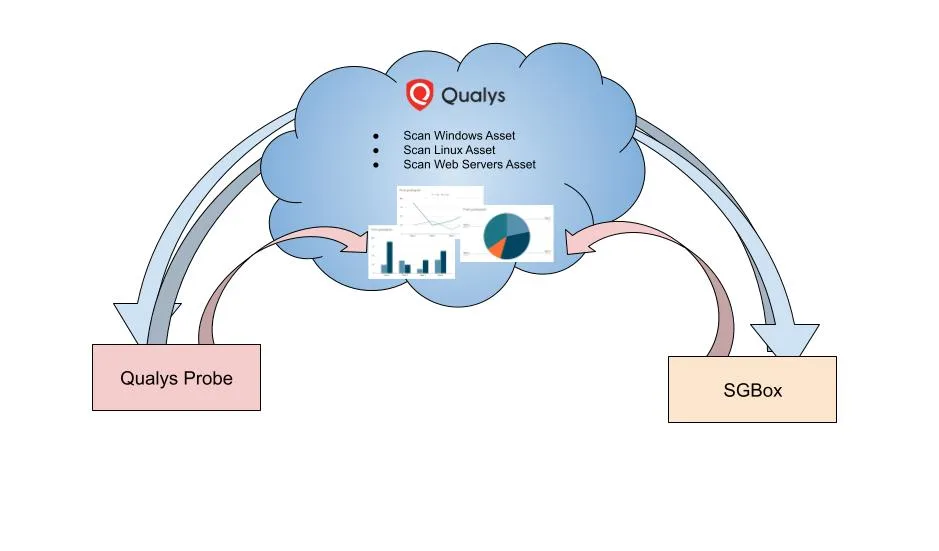
In the following section are described the steps executed by Qualys probe and the SGBox:
- SGBox create a job “Scan Windows Asset” in Qualys Cloud.
- The probe download the job from the cloud and execute the scan.
- Once the scan is finished the probe upload the results on Qualys Cloud.
- SGBox download the results from the cloud and store them locally in order to make comparison with previous/next scans.
Notes: All data stored in Qualys cloud are AES256 encrypted with a random key generated when the Qualys subscription was created.
In order to do that you need to connect you SGBox and your Qualys probe to your Cloud. Following the steps:
Download Qualys probe
You can download the latest Qualys probe from the Customer portal
Minimum requirements are 4 CPU Core, 8 GB di RAM e 56GB HDD.
Once created the Qualys VM on hypervisor, from the console it is necessary to assign a static IP address.
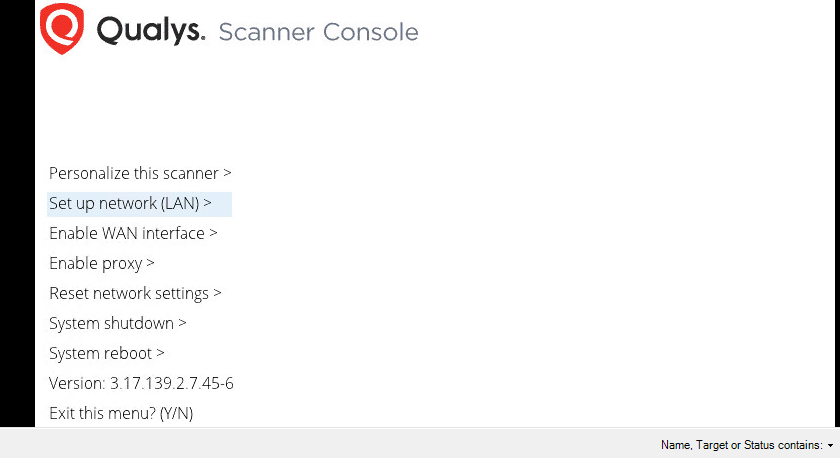
Enter your code or the code provided by SGBox
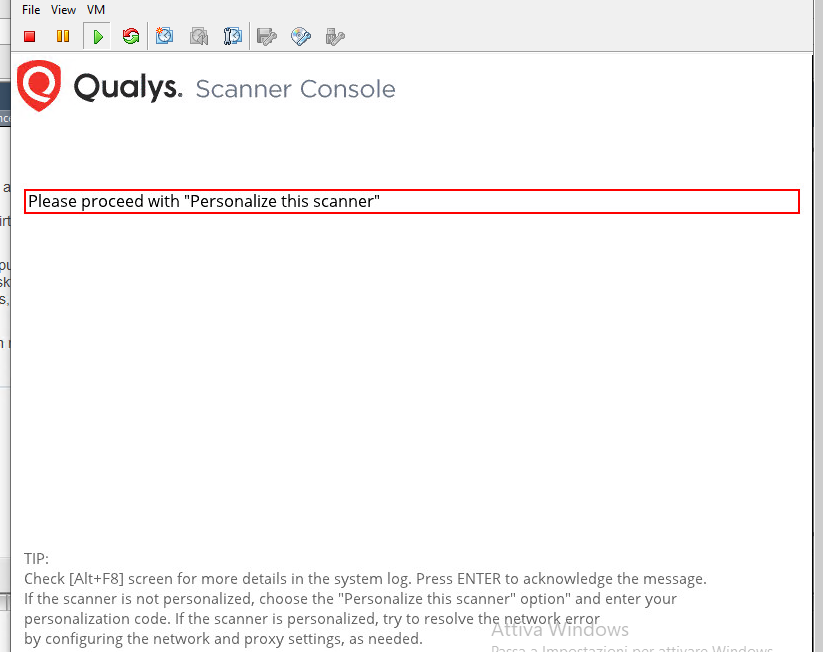
Notes: It is necessary to create a firewall rule to allow the qualys probe to communicate with qualys cloud, at qualysguard.qg3.apps.qualys.it port 443/tcp.
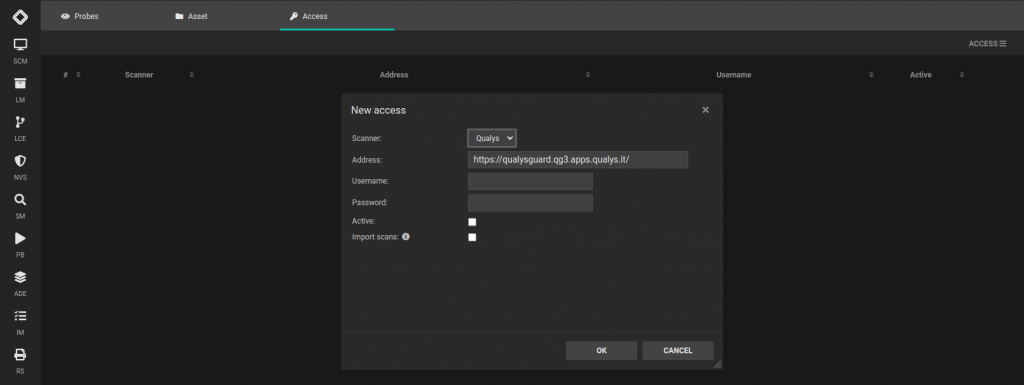
Qualys Cloud Connetion
From: NVS > Configuation > Access
Enter your URL, User and Password or the information provided by SGBox, to finish activate the flag on the Active field and save the changes.
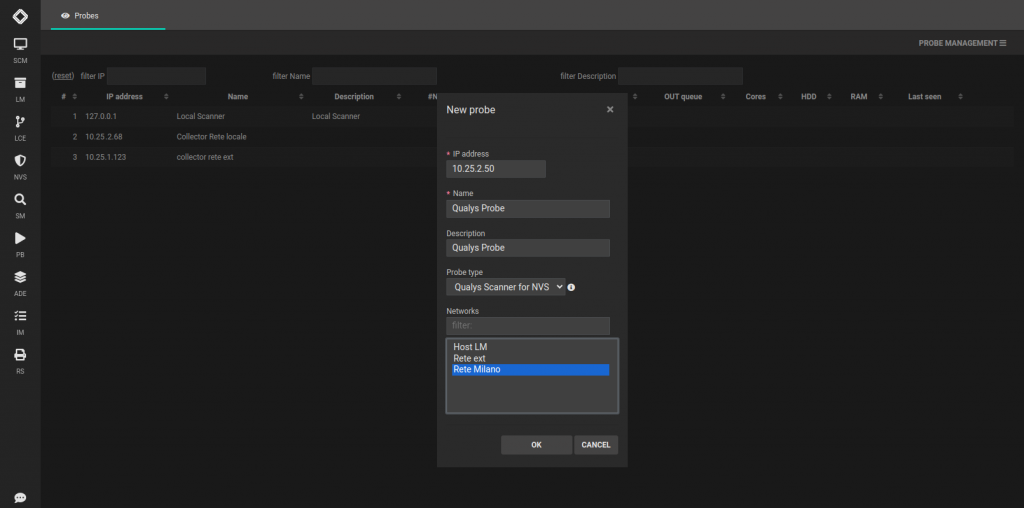
Create Qualys probe on SGBox
From: SCM > Network > Probe you need to enter the following parameters:
- the probe private IP
- choose Qualys Scanner for NVS as Probe type
- choose the managed networks
Create an asset for Qualys scan
From: SCM > Network > Asset create and asset visible in NVS Module:
- select the hosts target to the scan
- select NVS as module
- choose the Qualys policy you want to use


